In the last part of this Ableton Live beginner course we looked at how different synthesizers work. Now we use them for sound design. Out of Operator, Granulator, one click sample and an audio recording I build a kick, a bass line, a percussion loop and a melody. It gets messy, and that is fine. The point is that you design the sounds yourself.
In this part:
- How to make a kick with an oscillator in Operator
- How to layer sounds in an Instrument Rack with Cmd+G
- How to use Simpler for a click sample
- How to build a bass line with Granulator
- How to turn a recording into percussion
- How to reshape the same synth into a melody
Start with random notes
Operator is the way to go to just play around. Make a clip on a MIDI channel, double click it, draw in some notes randomly and play with it. Granulator makes very fast, very abstract sounds, so I let it play on a spot I like next to it. With three synths running you can very fast get some loops going and start something.
How do you make a kick in Ableton?
Here is how I make a kick in Operator:
- Use one note and make a super small loop.
- Go very deep. You can move the note down one by one, or hold Shift and press the arrow key down to jump from C3 to C2 to C1.
- Switch on the pitch envelope. You get a little line, and you can set the direction of the pitch, minus or plus.
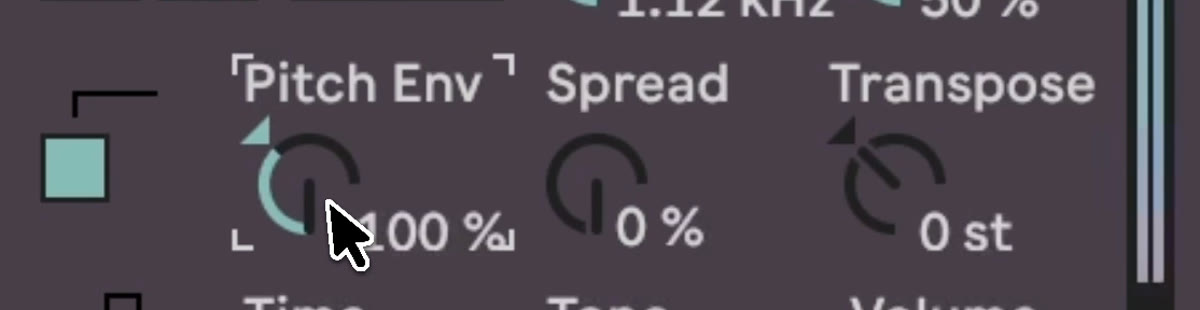
- Find a sweet spot. That is a kick for me.
- Shape the sound with the envelopes, and maybe add an overtone with a second oscillator.
What is an Instrument Rack?
A soft low kick is a start, and you can always layer it, for example with a sample.
- Select Operator and press Cmd+G. Now you have an Instrument Rack with Operator inside.
- Press Cmd+F, search for Simpler and drag it into the rack.
- Set Simpler to one shot and load a click sample.
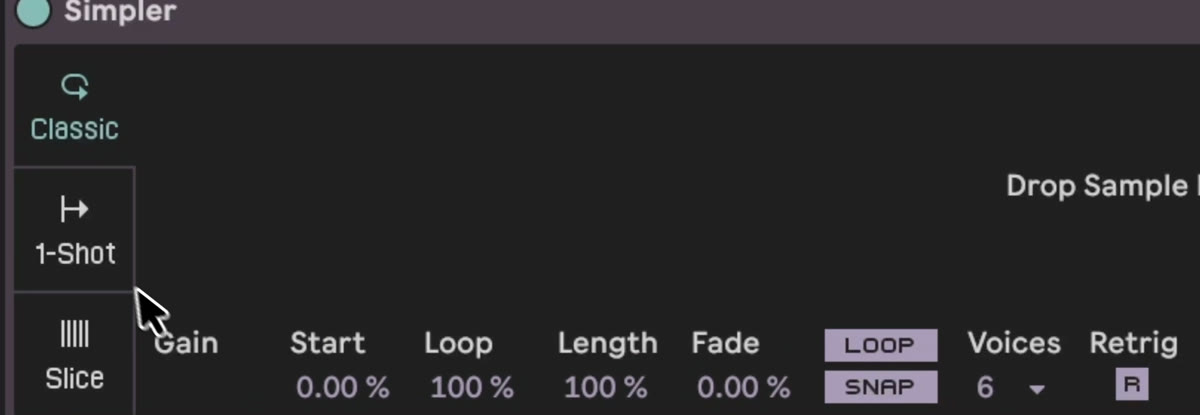
- The same MIDI note now plays the click and the low Operator note at the same time. Together they become one kick.
Now you can shape each part inside the rack. The Operator part too deep, the click just a little click. You can layer all three synths from the last part in one sound if you want. The sky is the limit in Ableton.
A bass line from Granulator
For the bass I use Granulator with the sequence I have running. Tip: double click a device and it folds up, which I find really helpful. Granulator has different algorithms. Clouds is good for drones, Classic is just classic. I switch on loop, make the grain size lower and go even deeper.

That gives a lot of overtones, so I put a filter after it to close that gap. Then I play the kick and the sub line together to hear what I am doing.
Percussion from an audio recording
Remember the last parts. I take an audio recording, pick a short moment, set the warp mode to Beats and 16, and let it play back.
Watch the loop. Sometimes you set the loop but the loop brace is not where the sound is. You can also select the area and press Cmd+L to loop it. Then I pitch it up and add a filter to give it some height. I don't want to use too many effects yet, we go deep into them in Part 6: Filters, EQ and drive. The one on top here is a phaser, and it makes the stereo image really weird.
A melody from the same Operator
I copy the Operator, take the click away, and use my old chord clip with some notes removed. This time I don't go deep. The pitch goes way higher, I change the pitch envelope, and on the envelope I change the attack so it is not so clicky and make the release longer. Then a bit of reverb. Or a lot.
Your homework
If you start doing this from the beginning, you will become a better sound designer than most of the people who just drag and drop samples from a library and call themselves producers. So learn synthesizers and learn to layer sounds. Sit down, make four channels or something, and design some sounds. Become a sound designer.
Made something? Show it in the Discord, that is what it is there for: https://discord.gg/MyKQkNRhRf
Previous: Part 4: Synthesizers. Next: Part 6: Filters, EQ and drive.