Auto Filter, EQ Eight and Saturator
21:04 · BEGINNER · FREE
Notes
Audio effects in Ableton Live are the thing that makes your sound shine and helps your synths stick out. There is a lot to explore, but as a beginner you don't need all of it. So we start simple with a filter, an EQ and some drive: Auto Filter, EQ Eight, Amp and Saturator.
In this part:
- How to find devices fast with Cmd+F
- What Auto Filter does: frequency, resonance, filter types
- How to use EQ Eight to cut and push frequencies
- Why the order of your devices matters
- How Amp and Saturator add drive
- What the dry/wet knob does
How do I find a device fast?
Cmd+F, or Ctrl+F on Windows, is your best friend. For me it is the most important shortcut in the world. Type filter and load Auto Filter.
What does Auto Filter do?
In its basic form Auto Filter is a filter you close or open, by touching the display or with the parameters. Double click a parameter to reset it.
For now we focus on three things: frequency, resonance and filter type.
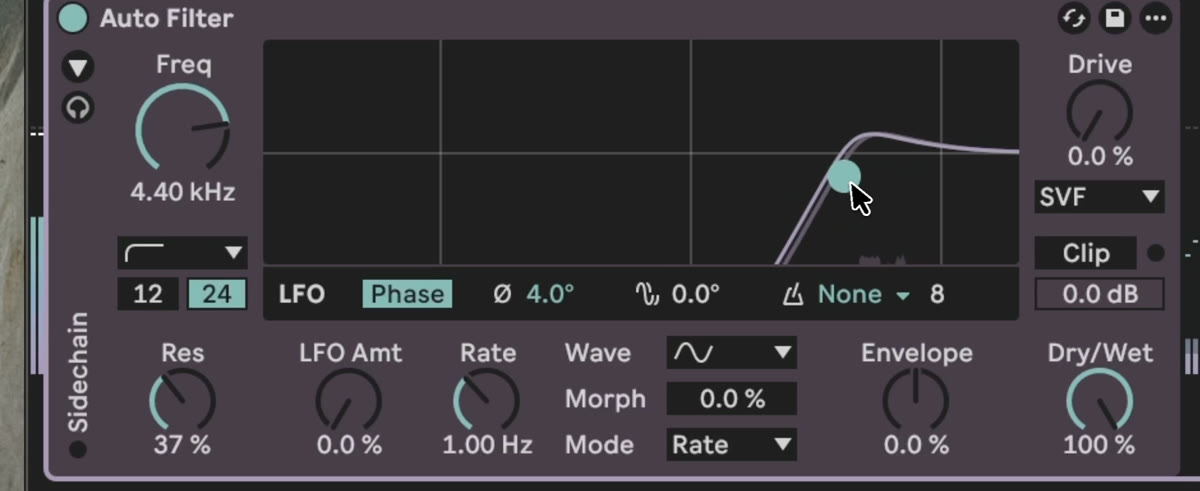
- Close a low pass filter on a loop and it cuts your highs. That can be the start of a bass line.
- Want the highs but not the bass? Switch to high pass. The same loop becomes a percussion sound.
- Band pass cuts both sides, and you choose which frequency stays.
Resonance can go really high and start peaking. If the meter gets red you are clipping, and you don't want that.
A few more controls: switch the slope from 24 to 12 and it gets a bit brighter. Drive is literally just adding volume. The envelope opens the filter with the incoming audio signal, which gives a real feeling of movement.
There are more types: a DJ filter, notch, morph (between high pass and low pass), comb (a kind of phaser effect), a resampling type that sounds like a bit crusher, and vowel. Just find what you really need. Most of the time you will need low pass, high pass and band pass.
EQ Eight and why device order matters
Close to the filter we have the EQ. There is EQ Eight, EQ Three and Channel EQ, but I recommend EQ Eight because you can see your frequencies.
The order of your devices makes a huge difference. Put EQ Eight after the filter and you see the frequencies the filter took away. Put it before and you see the full range. Always have that in mind.
How I use it:
- Pick a band and cut. Normal mode still lets a little bit through. x4 really cuts from that point on. Most of the time normal is enough.
- Click a band and change the Q factor. It says how sharp it is. Narrow to cut one peak, wider for a more formed sound.
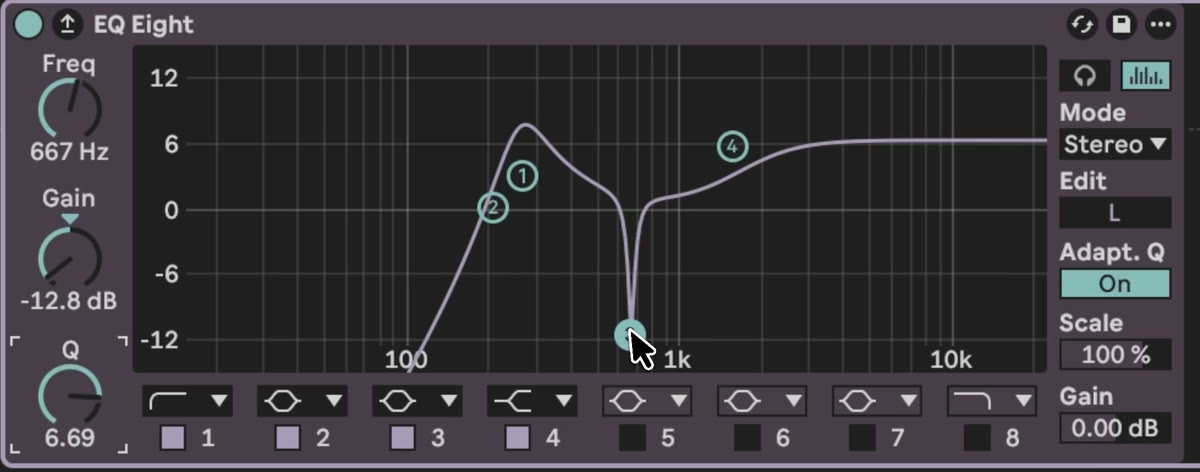
- In the big view you see the Hz, dB and note under your cursor in the bottom left corner.
The filter has more character. The EQ is great to cut the bass, push the highs and take out what you don't like. Everything else on the side you don't need for now.
Amp: push it back up
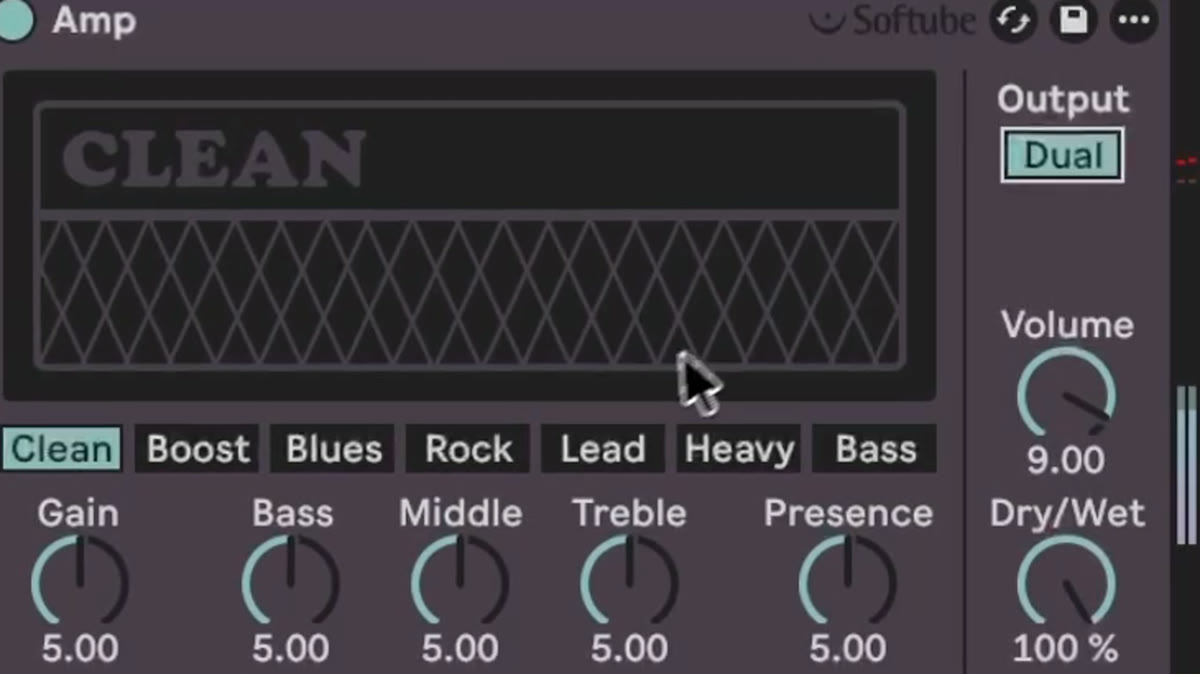
When you cut frequencies, you lose volume. My loop went from peaking at minus 6 to minus 18. That is headroom to form the sound.
Amp is an amp emulation and pushes the signal up instantly. It is mono at first, so switch it to dual for stereo. Blues, rock, lead and heavy all have a different character. Rock, lead and heavy make a lot of volume, so keep your hand on the volume knob or you blow your ears up. Amp can be harsh, but sometimes that is what you want.
Saturator and the dry/wet knob
If you want it softer, use Saturator. It has a drive knob, like the gain on Amp, and an output, like the volume.
Some audio effects have a dry/wet knob. Fully dry you hear no difference, almost like switching the device off. At around 50% you hear the dry and the wet signal equally. Use it when an effect is too harsh or you just want a layer of it on top.
Change the aesthetic of a sound
You like the groove of a sample, but not its sound aesthetic. In the video I cut the bass, because a bass line and a kick from Part 5: Designing sounds come later, and push the highs. It gets more present but loses volume. Saturator pushes it back up, mixed in at around 60 to 70.
Shift select the devices and press Cmd+G to group them. Now one button switches both on and off, so you can compare before and after.
What to try now
Put Auto Filter on a loop and play with frequency, resonance and type. Cut and push with EQ Eight, then bring the volume back with Amp or Saturator.
The effect racks I built for my own tracks and live sets, 15 racks: https://mordio.online/shop/086a1389-fc3b-4c9a-b5db-1c940502a8f0
Previous: Part 5: Designing sounds. Next: Part 7: Reverb, delay and sends.